ASC — Pre-Admission Stage
Note
The following describes an opt-in feature for practices that have ambulatory surgery centers (ASCs). To enable this feature for your organization, contact your CSM. For more information, see ASC Setup: Enable ASC Features.
ASCs typically document the pre-admission phase in the days leading up to a procedure taking place, which can include the internal steps performed by the practice or communications between the practice and the patient.
If desired, start documenting a surgical case by entering information at the Pre-Admission stage. You can continue to modify the information recorded at this stage at any time, even after signing for this stage.
Access the Pre-Admission stage
In the schedule, when you click an appointment for a surgical procedure, the Pre-Admission stage appears. This stage is available before and after a patient is checked in.

Pre-Admission highlights
The Pre-Admission stage has the following characteristics. See below for an overview of the Pre-Admission checklist, the document for this stage, and how to use it.
-
Entries are optional. You aren't required to enter information in the Pre-Admission checklist. If you decide not to enter this information, it won't impact the billing process or other stages.
-
Pre-populated checklist. Pre-Admission questions appear in the checklist by default. There's no need to produce questions or enter question text.
Note
Your clinic manager or administrator can modify the questions that appear in the checklist. For more information, see Manage ASC Templates.
- Custom notes. To provide additional information, you can append a note for each question / answer in the checklist.
- Last changed by (attribution). The user ID of the person who made the last change appears with the date and time the change occurred.
- Revise after signing. After signing for the Pre-Admission stage, you can revise the information captured as needed. Click Go to Pre-Admission Stage to update the information in the Pre-Admission Checklist.
- Access the Visits tab. Click the Visits tab in the left pane to access patient procedures or navigate to other stages in the current procedure. For details, see ASC: Visits Tab.
Pre-Admission Checklist
The Pre-Admission Checklist is the documentation for this stage.
Left side
In the checklist, document sections appear on the left side.
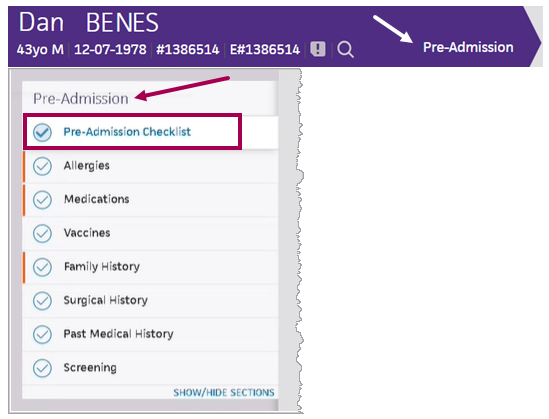
- For a surgical case appointment, the Pre-Admission stage is available before and after a patient is checked in.
- The Pre-Admission Checklist resembles the Intake checklist, but it does not have as many sections.
- The sections featured in the image above appear by default.
- To revise the default list, click SHOW/HIDE SECTIONS at the bottom of the list.
Right side
The right side of the Pre-Admission Checklist lists questions to ask the patient with the option to add notes.
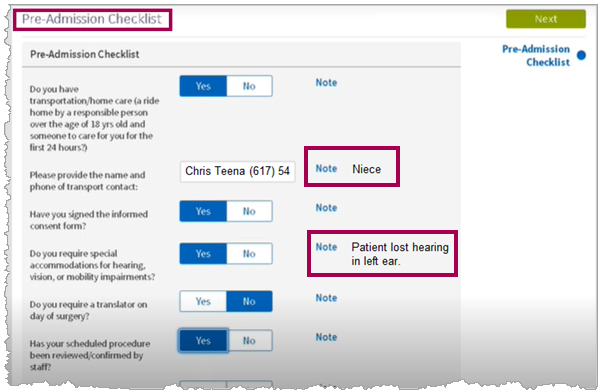
In this example, there is a Note that provides additional information for two answers. For detailed directions, see Complete the Pre-Admission Checklist below.
Complete the Pre-Admission Checklist
- Go to the Pre-Admission stage:
- From the schedule, select a surgical appointment.
- Click Go to Pre-Admission.
Note
You can also click Pre-Admission in the case briefing summary to access this section.
- In the Pre-Admission Checklist, enter the patient's responses to pre-admission questions provided.
- Click SHOW/HIDE SECTIONS if you want to change the list of default sections.
- Click Yes or No to answer a question.
- Click Note if you want to add information to an answer.
- Click Next to move to the next part of the checklist.
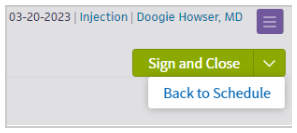
- Exit the Pre-Admission stage by clicking one of the following options:
- Sign and Close — To sign and close the stage.
- Back to Schedule — Returns you to the scheduling view.
- If you want to make revisions after you close the Pre-Admission stage, click Go to Pre-Admission in the patient chart.
- In the summary, review the answers and notes you documented.
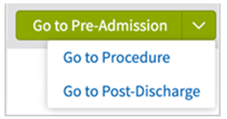
Navigate to other procedures or procedural stages
To view all procedures or navigate to other stages in a procedure, click the Visits tab to the left of the Post-Discharge stage. For details, see Navigate to Procedure Stages from the Visits Tab.